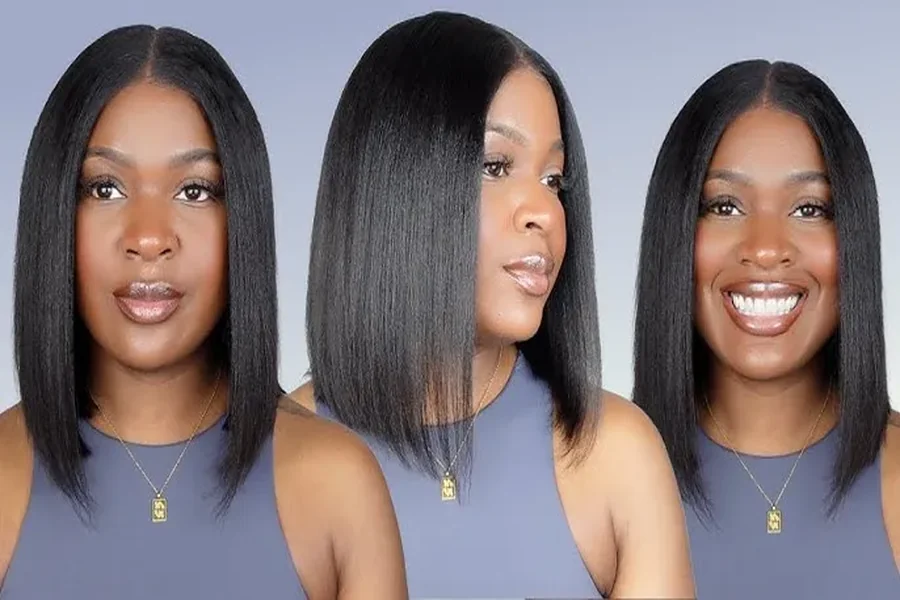
A glueless yaki bob wig is one of the most beginner-friendly ways to get a natural, polished look without dealing with adhesives. “Yaki” texture mimics a blown-out, lightly pressed finish, and the bob length is easy to manage. The goal of a good install is simple: a flat base, correct placement, secure hold, and a hairline (or bangs) that looks believable.
Below is a clear step-by-step routine you can follow at home. It works for both synthetic and human hair bob wigs, but human hair typically looks more natural and is easier to customize with heat.
Step 1: Prep your natural hair for a flat foundation
Glueless wigs still need a smooth base. If your hair is bulky underneath, the bob can sit too high and look unnatural.
Start by detangling, then choose a low-profile style like:
- cornrows straight back
- two flat braids
- a flat wrap for shorter hair
Moisturize lightly (don’t over-oil the roots), because excess product can cause the wig cap to slide. If your edges are fragile, protect them with a small amount of edge-friendly moisturizer rather than heavy gel.
Step 2: Put on a wig cap that matches your scalp tone
A wig cap helps grip and makes the part look more realistic. Choose a cap that’s close to your skin tone; this matters especially if your wig has lace and a visible part.
Pull the cap down to cover your hairline, then adjust it so it’s smooth with no wrinkles. If you plan to leave a tiny bit of your own edges out, keep the cap slightly behind that area—just be consistent and keep everything neat.
Step 3: Prep the wig before it touches your head
Installing is easier when the wig is ready.
- Shake it gently to loosen the fibers.
- If it’s a lace wig, trim excess lace carefully (leave a small margin; don’t cut into hair knots).
- Adjust the elastic band or straps to a medium setting to start.
For human hair bob wigs, you can also do a quick pre-style: a light hot-comb pass at the roots (low-to-medium heat with heat protectant) helps the wig lay flatter and look more like a natural blowout.
Step 4: Secure the wig “from back to front”
Hold the wig by the ear tabs. Tilt your head slightly forward and place the wig on starting at the back, then pull it forward into position. This method helps the cap lock onto the back of your head so it doesn’t slide.
Once it’s on, align the ear tabs evenly. If one side sits higher, the whole bob can look crooked, so take a moment here—this is a realism step, not just comfort.
Step 5: Adjust the fit (this is the core of “glueless”)
Glueless security comes from fit, not glue. Tighten in this order:
- adjustable straps at the nape
- elastic band (if included)
- combs/clips (only if you like them and they don’t cause tension)
The wig should feel stable when you gently shake your head, but it should not cause a headache. If it’s sliding, your cap may be too slick, or the straps aren’t tight enough. If it’s too tight, loosen slightly—tension around the hairline can damage edges over time.
Step 6: Make the hairline or bangs look natural
How you finish depends on your style.
If it’s a lace-front glueless bob
Press the lace down with your fingers, then tie a melt band or satin scarf around the hairline for 5–10 minutes. Even without glue, this helps the lace “hug” the skin and reduces lifting.
If the part looks too stark, add a small amount of powder or concealer along the part to match your scalp. Keep it subtle—over-brightening can look fake.
If it’s a bob wig with bangs A bob wig with bangs is often the easiest glueless install because the bangs cover the front and reduce hairline work. The main goal is shaping: use a round brush and low heat to curve the bangs slightly, then separate them with your fingers so they don’t look like one solid block. Airy, soft bangs read the most natural.
Step 7: Lay the top flat and keep the yaki texture realistic
Yaki should look like a blowout—smooth at the crown, not plastered down. Use a hot comb lightly at the roots to reduce puffiness while keeping natural body. Avoid heavy oils or high-shine sprays at the top; too much shine is one of the fastest ways to make any wig look artificial.
If you need flyaway control, use a light mist of holding spray on a brush and smooth the surface gently. This keeps the texture natural and touchable.
Step 8: Shape the bob ends so it looks “cut,” not “wiggy”
A realistic bob usually has intentional ends. Choose one finish:
- slight under-curl for a classic bob
- a gentle bend for a modern look
- a small flip for trend style (keep it subtle)
Do minimal heat, then brush through so the ends look soft. With human hair bob wigs, a small end bend can make the wig look like it was professionally blow-dried and styled.
Step 9: Final checks for security and realism
Look at the wig from multiple angles in natural light:
- Is the bob even on both sides?
- Is the crown smooth but not flat?
- Does the part match your scalp tone?
- Does the hairline sit slightly behind your natural hairline?
Do a quick movement test—turn your head and tuck hair behind your ear. A good glueless install should stay in place without you touching it constantly.
Conclusion
Installing a glueless yaki bob wig is mostly about preparation and fit: flatten your base, use a scalp-toned cap, place the wig correctly, tighten the straps for security, then finish with light smoothing and subtle end shaping. For the most natural movement and restyling flexibility, many people prefer human hair bob wigs. And if you want the simplest install with the least hairline effort, a bob wig with bangs is one of the most foolproof options.
If you tell me whether your wig is lace-front, closure, or full machine-made (no lace), I can tailor the steps to your exact cap construction, and you can explore more helpful guides on wikimitra.
I’m Owais Ahmed, the creator of DailyMessagez.com — a place where emotions find words. With a passion for writing and expertise in SEO, I craft heartfelt messages that not only connect with readers but also reach the right audience. My goal is to inspire love, gratitude, and positivity through every line.